
A production manager once told me they bought a high-wattage ultrasonic cleaner expecting it to remove all machining chips, only to find residue still trapped in blind holes after the cycle. The real problem wasn't power—it was how the parts were held and whether the frequency matched the contaminant. When selecting ultrasonic cleaning systems for industrial parts, engineers face dozens of configuration choices that matter far more than wattage alone. Matching tank configuration, automation level, and cleaning chemistry to your specific part geometry and target cleanliness is what separates a system that runs reliably from one that causes downstream coating failures. This article walks through the practical selection criteria I've applied across projects in 20 countries, focusing on the engineering decisions that directly affect cleaning outcomes.
How Ultrasonic Cleaning Removes Industrial Contaminants
Ultrasonic cleaning works by generating microscopic cavitation bubbles that implode on part surfaces, dislodging oils, chips, and debris. But the cleaning action isn't uniform—it's shaped by frequency, power density, and how parts are positioned relative to the transducer field. In manufacturing, the contaminants we deal with range from heavy stamping oils and abradable coatings to fine polishing compounds, each requiring a different combination of mechanical and chemical energy.
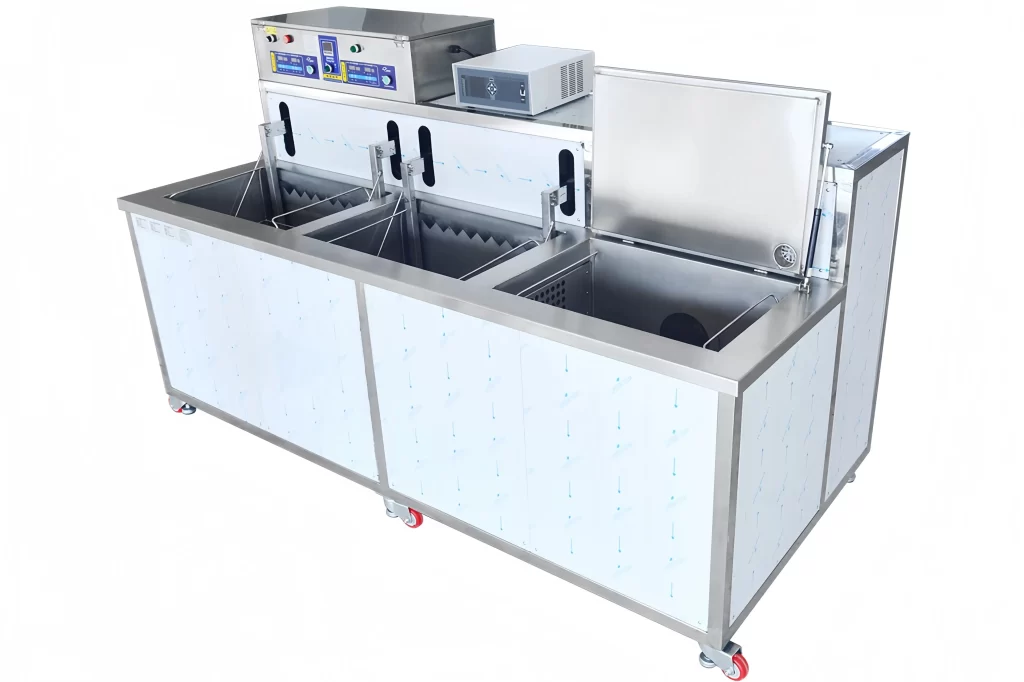
The cleaning process typically moves through several stations: pre-cleaning to remove bulk contamination, ultrasonic immersion in a heated detergent or solvent, one or more rinses, and drying. A single-step system might handle light-duty parts, but most industrial applications need at least three tanks to avoid cross-contamination and ensure repeatable results. For example, the multi-tank ultrasonic cleaners we build at GTKCLEAN run a sequence of ultrasonic degreasing, RO water rinse, and hot air drying, with optional passivation and vacuum drying stages for components going directly to coating. The key parameter isn't just the ultrasonic frequency—it's ensuring that every surface, including blind holes, sees cavitation intensity high enough to remove the target contaminant within the cycle time you can afford.
Why 28 kHz vs. 40 kHz Matters for Different Part Types
Lower frequencies like 20 kHz to 28 kHz generate larger, more energetic bubbles that excel at removing heavy soils from steel and iron. But those larger bubbles can also cause surface erosion on softer materials. Frequencies above 40 kHz produce finer cavitation that penetrates tight gaps without pitting, which is essential for precision-ground components, medical instruments, or parts with delicate coatings. When I evaluate a new application, I look at the hardest-to-clean feature—a threaded hole, a cross-drilled passage, or a stamped recess—and choose the frequency that will cavitate inside that feature without damaging the surrounding material.
How Chemistry Extends Cavitation Effectiveness
Ultrasonic energy alone won't dissolve most industrial residues. The cleaning solution—alkaline, neutral, or solvent-based—must wet the contaminant, lower its surface tension, and hold it in suspension after removal. Elevated temperature helps: stamping oil dissolves faster at 55 °C than at 30 °C. But hotter isn't always better; some hydrocarbon solvents work best around 45 °C to avoid excessive vapor loss. I've seen lines running the same parts shift from good to poor cleaning overnight because someone turned the tank heater up to “speed things up” and actually reduced cavitation intensity (higher temperature lowers the vapor pressure threshold, weakening bubble collapse). Matching the detergent to both the contaminant and the operating temperature window is a tuning exercise that pays off in consistent first-pass yields.
Comparing Automated and Manual Ultrasonic Cleaning Systems
Manual ultrasonic cleaning systems—where an operator loads, transfers, and unloads baskets—work well for low-volume, high-variety production. They're flexible and have lower upfront cost. But they introduce variability. Every operator dips parts differently, timing isn't precise, and drying often relies on compressed air blow-off that leaves water spots.
Automated systems, on the other hand, enforce consistent cycle parameters. A PLC-controlled hoist moves the basket through the tank sequence on a fixed recipe. Drying stations use hot air or vacuum to remove moisture without operator intervention. The trade-off is higher capital cost and less flexibility for frequent part changeovers. In practice, I've found that mid-volume operations with mixed part families often justify a semi-automatic system—manual loading but automated transport and cycle control—because it captures most of the quality benefit without the full cost of a conveyor.
When Manual Cleaning Is Still the Right Answer
If you clean fewer than a hundred parts per day across thirty different geometries, a benchtop ultrasonic cleaner paired with a rinsing station and compressed air drying might be the most practical solution. There's no point automating a process that changes every hour. I often advise prototyping a cleaning protocol manually first, then automating once the recipe and throughput requirements are validated.
If your production volume sits in that gray zone—too many parts for a manual station but uncertain about full automation—reach out with your daily throughput and part mix at [email protected]. We can map out a semi-automatic configuration that fits your current scale and leave headroom for future growth.
How to Know When Automation Pays for Itself
The crossover point usually arrives when labor cost, scrap from inconsistent cleaning, or line downtime from dwell-time mismatches becomes visible on monthly quality reports. One aerospace supplier we worked with cut rework rates by 60% after switching to an automated multi-tank system with recipe control, simply because every part saw the same exposure time.
Matching Tank Configuration and Basket Design to Your Industrial Parts
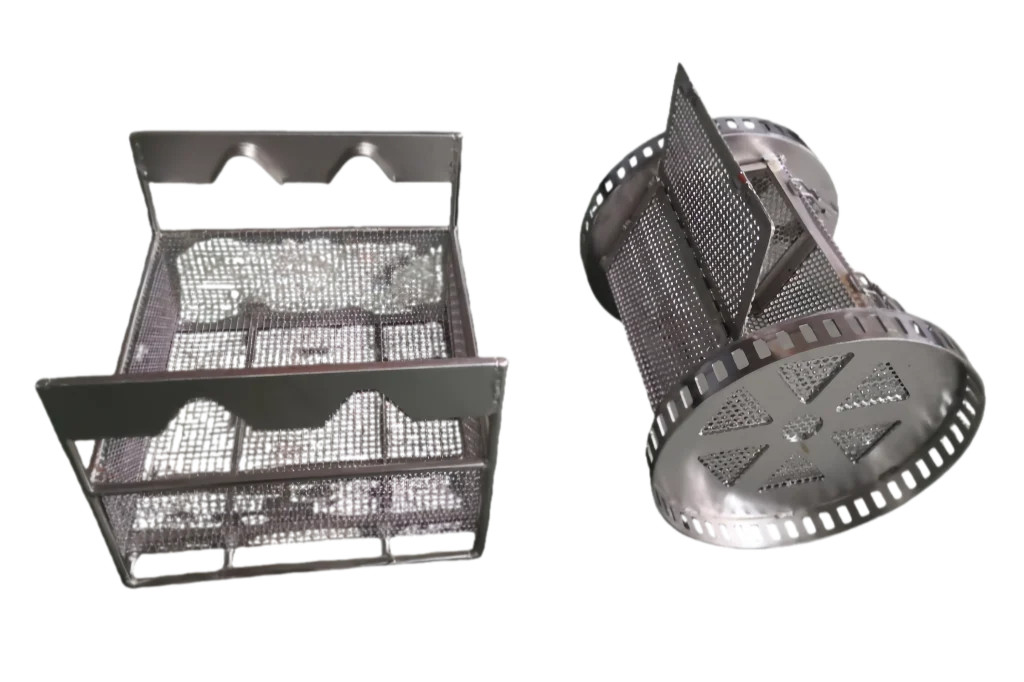
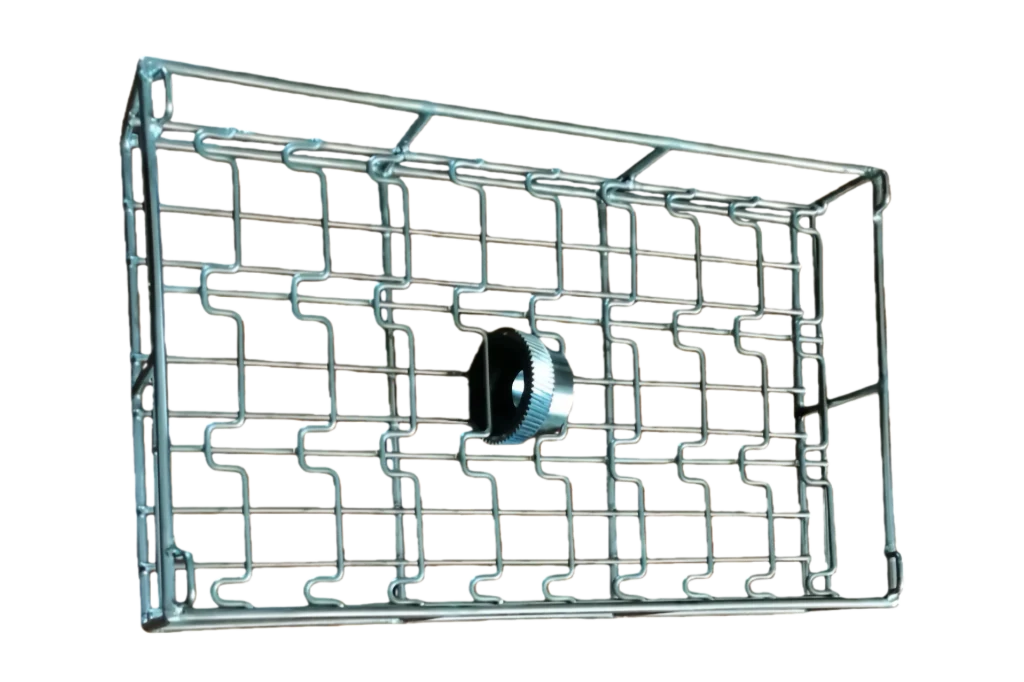
Ultrasonic cleaning performance is as much about how you hold the part as about the tank itself. A dense basket of parts shields the center from cavitation. Trapped air in blind holes dampens energy. Wrong fixture material—like carbon steel in an aqueous tank—introduces rust. We design cleaning baskets to be thin-walled stainless steel with targeted perforations that let cavitation reach the parts while keeping them from contacting each other. For parts with deep recesses, a rotary basket that continuously reorients the workpiece inside the ultrasonic field can eliminate cleaning shadows.
How Basket Rotation Rate Affects Cleaning of Blind Holes
Rotary baskets spin slowly—about 5 to 15 rpm—to gently tumble parts or to rotate a fixture so that every cavity is exposed to the transducer field. Too fast, and the parts get scuffed; too slow, and the cycle time must stretch to guarantee coverage. For stamped connectors with deep-drawn cups, we've used a rotation synchronized with the ultrasonic pulsing to ensure at least three cavitation pulses inside each cup per cycle. That took a few iterations to get right, but once locked in, reject rates fell below 0.2%.
Multi-Tank Configurations for Sequential Cleaning
A typical industrial multi-tank ultrasonic system has four to six stations: pre-wash, ultrasonic clean, rinse, second rinse (often ultrapure), drying. Adding a rust inhibitor soak before drying extends shelf life for steel parts going into inventory. For solvent-based cleaning, a vapor degreasing stage can replace the second rinse and provide residue-free drying. The table below outlines common tank configurations:
| Tank Sequence | Best For | Typical Tank Count |
|---|---|---|
| Ultrasonic degrease → Rinse → Dry | Light soils, simple shapes | 3 |
| Pre-wash → Ultrasonic clean → RO rinse → Hot air dry | Machined parts with cutting fluids | 4 |
| Pre-wash → Ultrasonic clean → RO rinse → DI rinse → Vacuum dry | PVD coating pre-treatment | 5 |
| Pre-clean → Ultrasonic degrease → RO rinse → Passivation → DI rinse → Hot air dry | Steel parts requiring corrosion protection | 6 |
Integrating Ultrasonic Cleaning into Continuous Production Lines
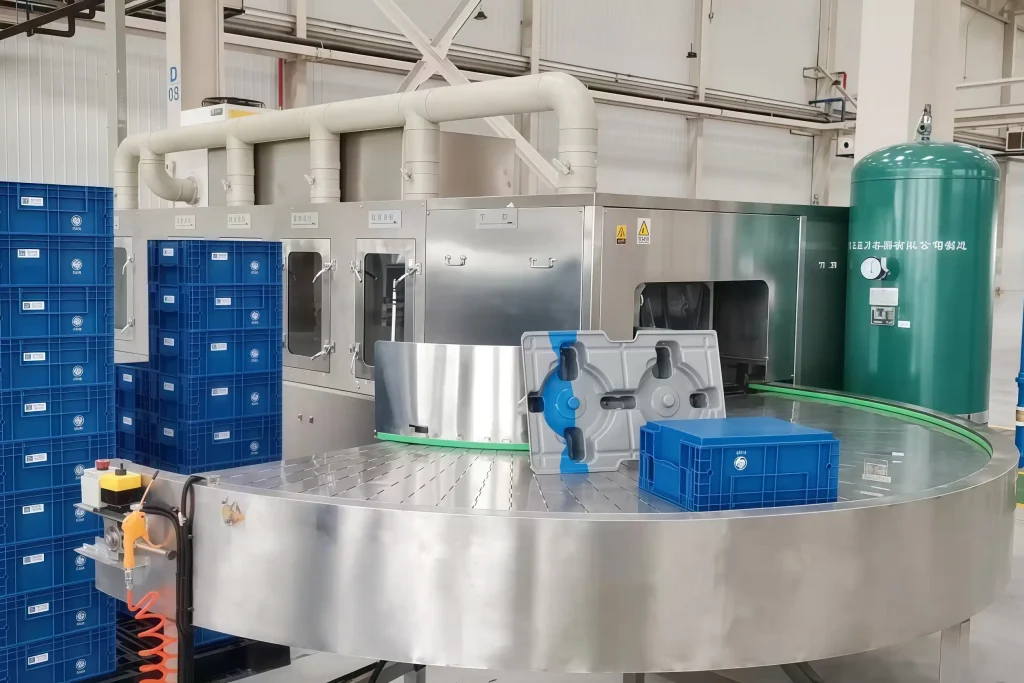
When cleaning is part of a cell that feeds an assembly or inspection station, cycle time must sync with the upstream and downstream machines. Inline ultrasonic cleaners can run at 0.5 to 1 meter per minute on a conveyor, matching typical machining center throughput. A tunnel washer with high-pressure spray pre-wash followed by ultrasonic immersion and hot air drying can keep pace with a CNC line machining a few thousand parts per hour, as we've done for aluminum alloy housings.
Matching Conveyor Speed to Contaminant Removal Time
Conveyor cleaners often use spray bars to knock off loose chips before the ultrasonic chamber, which reduces the soak time needed. The ultrasonic section needs at least 2 to 3 minutes of immersion time for most cutting fluids; that translates to a tank length based on conveyor speed. If your line runs at 0.8 m/min, you need an ultrasonic tank about 2 meters long to deliver a 2.5-minute exposure. Skimping on tank length to save floor space creates a bottleneck that ruins downstream quality. I've had customers try to cram a cleaning stage into a footprint half the required size and then wonder why parts failed salt spray tests. The cleaning process won't compromise; either you allocate the space for the required dwell time, or you accept higher rework.
How to Handle Part Transfer Without Contamination
Automated conveyors that carry parts directly from machining to cleaning eliminate handling and reduce contamination from set-down. But the conveyor material matters. Standard steel chain links in a wet ultrasonic environment rust within weeks. We use stainless steel 304 or 316 mesh belts and slat conveyors, which handle both the wet chemistry and the abrasive nature of metal chips. Adding an air knife right at the exit of the cleaning section helps prevent carryover of detergent into the rinse tank, preserving water quality and reducing detergent consumption.
Verifying Cleaning Results and Calculating Equipment ROI
Process validation needn't be complex. A simple particle count on a rinse coupon, a visual inspection under magnification, or a dyne test for surface energy can confirm cleanliness. For parts going to PVD coating, I recommend a water contact angle measurement below 30 degrees or a weight change of less than 0.1 mg per sample after cleaning and drying. These thresholds directly predict coating adhesion.
How to Set Measurable Cleanliness Targets
Start with the failure mode. If coating delamination is the problem, the target is surface energy or residue weight. For bearing assembly, particle counts above the bearing clearance gap cause wear, so classify particles by size. Define a pass/fail criteria that ties to the actual downstream process, not an abstract “clean” definition. In my experience, most industrial parts need to be cleaner than an ISO 4406 15/13/10 level for hydraulic applications, but for less demanding assemblies, 17/15/12 may be adequate. Spending the extra cycle time to hit a cleaner spec than the process needs is wasted money.
ROI Calculation for Industrial Ultrasonic Cleaning Systems
The cost of an ultrasonic cleaning system goes beyond the purchase price. Include installation, detergent, water treatment, energy, maintenance, and operator training. A five-tank automated system might cost $80,000 to $120,000 delivered, but if it eliminates two manual wash stations and reduces rework by 5%, the payback period often falls within 18 months. The table below shows a typical cost breakdown:
| Cost Category | Percentage of Total Cost | Notes |
|---|---|---|
| Equipment purchase | 55–65% | Tank, transducers, PLC, conveyor |
| Installation | 10–15% | Rigging, utility connections |
| Operating consumables | 10–15% per year | Detergent, water, filters |
| Maintenance | 5–10% per year | Transducer replacement, pumps |
| Training | 2–5% | Operator and maintenance staff |
When the cleaning system is part of a larger automation upgrade, tax incentives or accelerated depreciation often apply, shortening the financial return. Getting a firm quote that includes all ancillary equipment—baskets, plumbing, exhaust—prevents budget overruns.
The Engineering Decisions That Affect Long-Term Cleaning Reliability
Even the best-designed cleaning system degrades without proper maintenance. Transducers wear out after several thousand hours at full power; they lose efficiency gradually, not all at once. A regular foil test can detect this drift. Pump seals, heater elements, and filters have predictable service intervals that should be built into the production schedule.
How to Detect Transducer Degradation Before Failure
Place a piece of aluminum foil in the tank weekly and run a brief cycle. Pinhole erosion indicates good cavitation intensity; larger, irregular marks suggest uneven transducer output. If the foil shows fewer pinholes in one zone, measure the transducer resistance with a megohmmeter. A drop from the rated value of 10 to 20 kΩ to below 5 kΩ indicates imminent failure. Replacing transducers proactively prevents sudden line stoppages.
When to Update Cleaning Chemistry and Filtration
If detergent consumption rises without a change in throughput, the filtration system likely isn't removing carried-over oils effectively. A simple oil-weir skimmer can double the bath life. For solvent systems, a distillation recovery unit can reclaim 95% of the solvent, reducing both cost and environmental reporting burden. I've seen plants cut solvent purchases by 80% after adding a closed-loop recovery system to a hydrocarbon ultrasonic cleaner.
Common Questions About Industrial Ultrasonic Cleaning Systems
What's the most common mistake when buying an ultrasonic cleaning system?
Focusing only on ultrasonic power and ignoring material handling. A system with 1000 watts of ultrasonic output will still leave shadow zones if parts are packed too densely or oriented wrong. The basket design, rotation, and transducer placement matter more than a wattage number. Start with a test clean of your actual parts before finalizing the specifications.
How do I know if I need aqueous or solvent cleaning?
It depends on the contaminant and part material. Water-based cleaning with alkaline detergent handles most machining fluids and particulate soils on metals without pollution concerns. Solvent cleaning (hydrocarbon or modified alcohol) is needed for deep blind holes where water can't dry quickly, or when parts have tight crevices that trap residue. Solvents also evaporate without water spots, which is critical for electronics and precision optics.
What throughput can I expect from an automated system compared to manual?
A single-station manual system might process 10 to 15 baskets per shift, while a multi-tank automated line can handle 40 to 80 baskets per shift, depending on cycle time. The bigger gain is consistency: automated systems reduce scrap that erodes throughput gains. When the cleaning process becomes a bottleneck, extending the working hours of an automated system usually costs less than adding labor to a manual one.
Is it worth upgrading from a manual to a semi-automatic system?
If your production volume exceeds about 200 parts per shift and you're seeing quality variation between operators, a semi-automatic system with manual loading but automated tank transfer and cycle control will pay for itself in reduced rework within 12 to 18 months. The incremental cost over a manual setup is typically 40% to 60% higher, but the labor savings and quality improvement offset it quickly.
How do I validate that my cleaning system meets a customer's cleanliness specification?
Request the exact specification document—many include accepted test methods like gravimetric analysis, particle counting, or surface energy measurement. Then run your parts through the proposed cleaning recipe and send samples to an independent lab for verification. At GTKCLEAN, we offer pre-sale test cleans in our application lab to confirm a configuration before you commit to purchase. If your customer's spec requires certification, we can document the process parameters and test results as part of the equipment handover. Share your part drawings and the specification with us at [email protected] or call +86 17768507147, and we'll confirm which tank sequence and chemistry will meet that requirement.
If you're interested, check out these related articles:
Multi-Tank Ultrasonic Cleaning: A Deep Dive into Industrial Configurations
Ultrasonic Transducer Technology: An Expert’s Guide to Industrial Cleaning
 English
  German
  Spanish
  French
  Russian
  Portuguese