
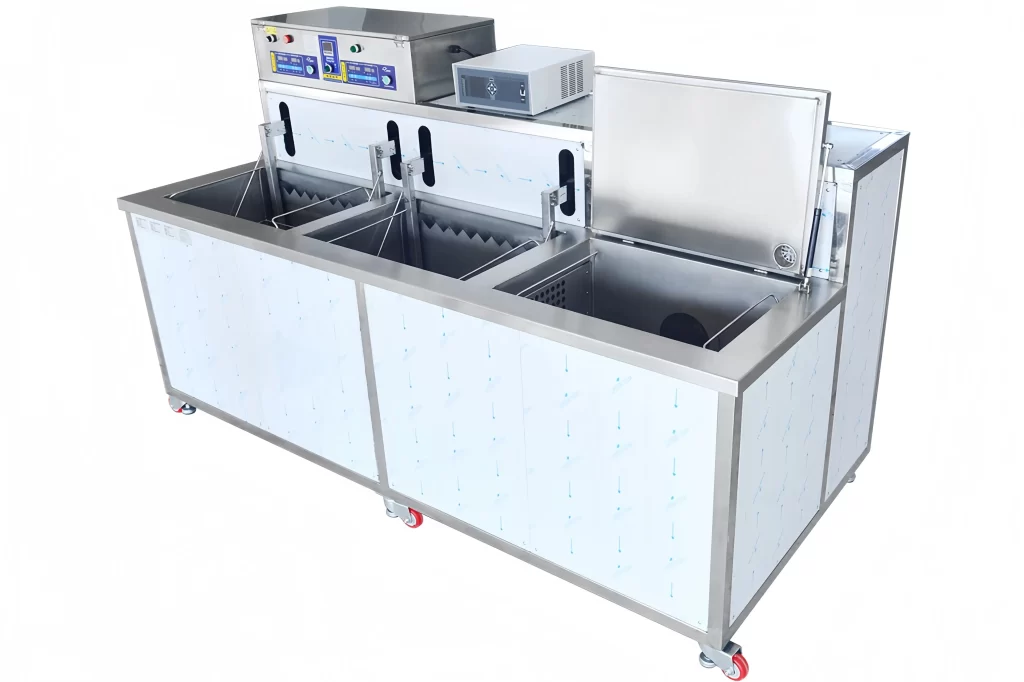
For manufacturers supplying aerospace, medical, or precision automotive components, surface contamination that exceeds specified limits can mean scrapped batches and lost certifications. A multi-tank ultrasonic washer engineered to meet high cleanliness requirements is often the only production-scale solution that delivers repeatable, particle-free surfaces. But bolting extra tanks onto a generic design rarely works. The difference between a reliable system and one that underperforms lies in the precise configuration of cleaning stages, chemical management, and drying method. Our work deploying ultrasonic systems across 20+ countries has repeatedly shown that a carefully designed multi-tank system can achieve ISO 16232 level 7 or better consistently, while an ill-configured setup creates as many problems as it solves.
How Multi-Tank Configurations Improve Cleaning Performance
Single-tank ultrasonic washers struggle with high cleanliness because contaminants removed in the cleaning stage remain suspended in the bath and can redeposit on part surfaces during rinsing. Multi-tank systems isolate each process step, preventing cross-contamination between stages. The typical progression moves parts from a degreasing tank through one or more ultrasonic rinse tanks to a fresh DI water rinse and finally drying. This sequential isolation is what enables a system to hit single-digit particle counts repeatedly over high-volume production runs.
We've observed in projects where a customer initially used a single-tank manual washer that recontamination was the primary reason for failing post-wash particle tests. Switching to a three-tank automatic line—ultrasonic wash with filtration, DI rinse, hot air dry—immediately brought parts within the required cleanliness spec. The key is that each tank removes a different contaminant fraction without reintroducing earlier residues.
The number of tanks and their specific functions should be driven by the heaviness of the incoming soil load and the target cleanliness. For example, a line processing machined aluminum housings with cutting oil and fine chips might require a high-pressure spray pre-wash, an ultrasonic degrease tank, a low-frequency ultrasonic rinse, a DI cascade rinse, and finally vacuum drying. That's a five-tank configuration. Conversely, a lightly loaded stamping line might work well with a four-tank setup: ultrasonic wash, first DI rinse, second DI rinse, hot air dry.
Key Process Stages for High Cleanliness Results
The cleaning stages in a high-cleanliness multi-tank washer are not interchangeable. Each must be selected and tuned for the part material, geometry, and contaminant type.
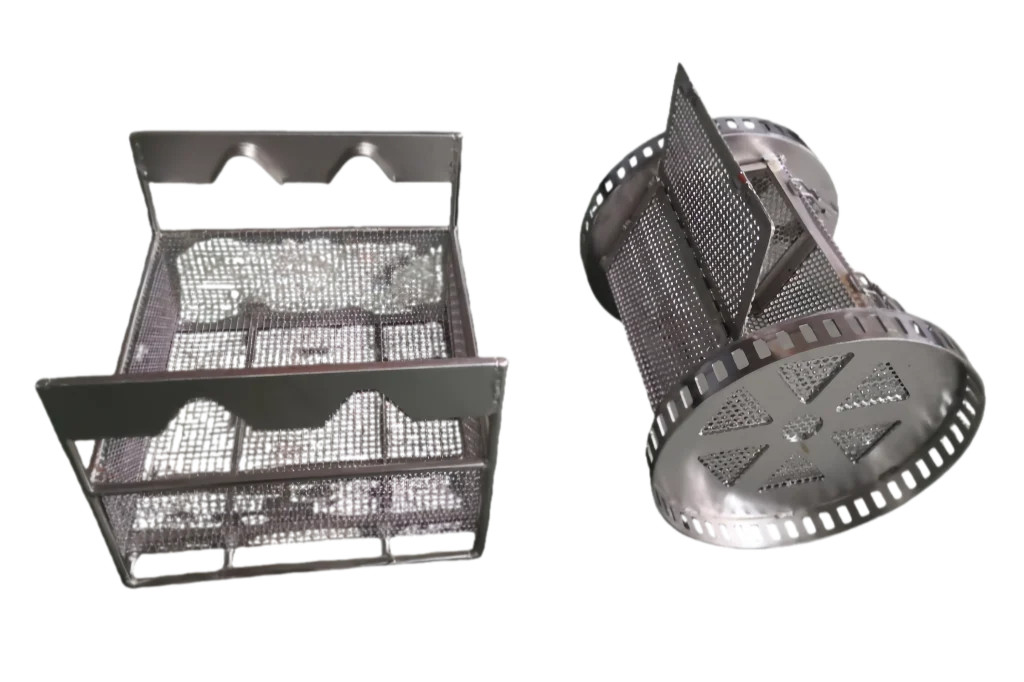
Pre-clean or degreasing removes bulk oils and greases. We typically use an alkaline detergent heated to 45–65°C, with ultrasonic agitation at 28–40 kHz depending on the part. Filtration loops on this tank are critical to extend chemical life and prevent re-deposition.
Ultrasonic rinse uses clean water or a neutral solution to remove loosened particulate. The ultrasonic frequency in this stage often shifts higher (40–80 kHz) to reach into micro-recesses and blind holes. This is particularly important for parts like fuel system components where a single 50 µm particle can cause a failure.
DI water rinse replaces the previous bath with deionized water to eliminate ionic residue. In our multi-tank systems, we maintain final rinse conductivity below 5 µS/cm, often using a cascade overflow design to keep the rinse water clean. High-purity rinsing is non-negotiable for pre-coating applications where residual ions cause coating defects.
Drying prevents water spots and ensures parts are ready for assembly or packaging. Hot air drying at 80–100°C is sufficient for many geometries, but complex parts with blind holes often require vacuum drying to pull moisture out of internal cavities. Our experience with vacuum drying on PVD pre-coating lines has shown that it eliminates water-spot-related adhesion failures.
The table below summarizes these stages and typical parameters.
| Stage | Typical Duration | Temperature | Key Parameter |
|---|---|---|---|
| Ultrasonic degrease | 5–10 min | 45–65°C | Frequency 28–40 kHz |
| Ultrasonic rinse | 3–5 min | 30–40°C | Frequency 40–80 kHz |
| DI water rinse | 2–3 min | Ambient–30°C | Conductivity ≤5 µS/cm |
| Drying (hot air) | 5–10 min | 80–100°C | Clean, filtered air |
If your program involves parts with deep internal cavities or very low residue limits, it is worth confirming that the drying stage can achieve the required residual moisture level before finalizing your BOM—reach out to us at [email protected] to evaluate your options.
Tailoring Tank Sequencing and Chemical Control to the Cleanliness Standard
The sequence of tanks and the chemistry used in each must align with the specific cleanliness standard your parts must meet. ISO 16232, for instance, specifies different particle size and count limits for different component cleanliness levels. Achieving Level 3 (very clean) requires more aggressive degreasing, multiple rinses, and validated measuring of final particulate levels. VDA 19, the German standard, adds requirements for residual film and ionic contamination, which influences the choice of detergent and the need for a dedicated deionized rinse with conductivity monitoring.
We have configured lines for aerospace hydraulic components where the specification demanded fewer than 10 particles larger than 63 µm per component after cleaning. That forced us to include a low-frequency ultrasonic tank (20 kHz) with high cavitation energy to dislodge embedded chips, followed by two rinse stages with progressively cleaner DI water and a final hot air dry with HEPA filtration to prevent airborne recontamination. Standard off-the-shelf multi-tank machines would not provide the needed rinse quality or drying filtration without modification.
The chemical side is equally important. For water-based systems, the detergent must be compatible with both the part material and the heating element, and its concentration must be controlled with automatic dosing to prevent surfactant depletion over a shift run. In solvent-based multi-tank lines, hydrocarbon or modified alcohol solvents require vacuum drying and solvent recovery to keep consumption low, as we've integrated into our fully automatic hydrocarbon cleaning systems. The decision between aqueous and solvent depends on the soil type, part geometry, and the facility's environmental permits.
Drying Methods for Zero-Residue Surfaces
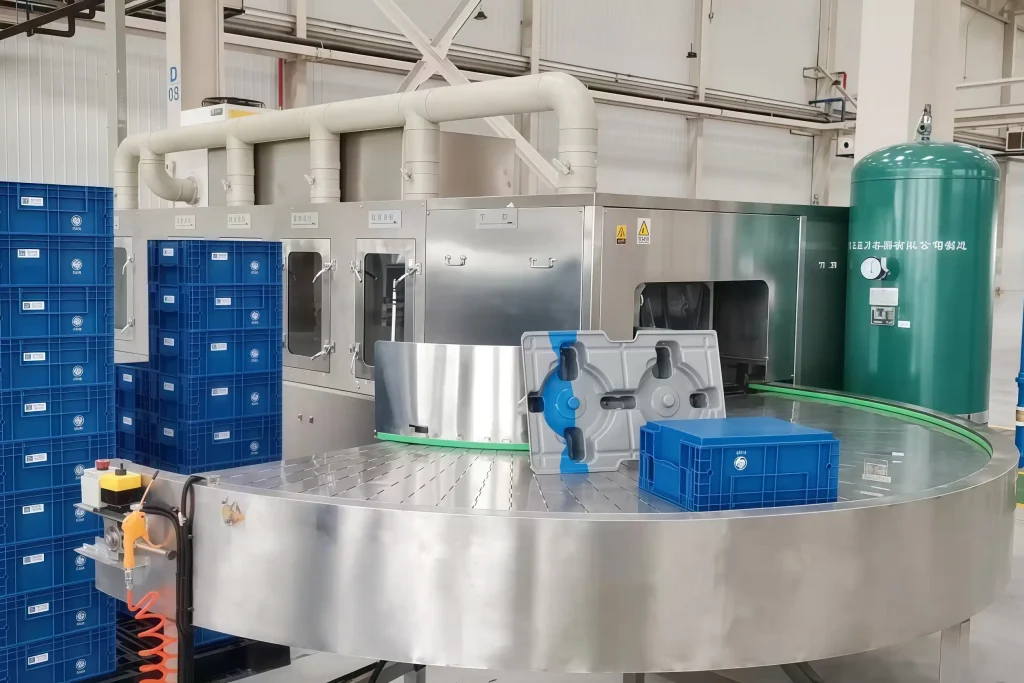
Even with perfect washing and rinsing, an inadequate drying stage will leave water spots, mineral residues, or, in the case of solvent processes, a thin film. For high-cleanliness applications, the drying method must be selected as carefully as the cleaning stage.
Hot air drying is the most common method. We use recirculated, filtered hot air to avoid introducing contaminated air onto clean parts. The temperature is kept low enough to avoid thermal expansion issues but high enough to evaporate moisture within 5–10 minutes. For plate-shaped parts or parts with simple geometry, this works well.
Vacuum drying is superior for parts with blind holes, threads, or stacked interfaces where liquid can pool. We've applied vacuum drying in lines that clean surgical instruments and implant components, where any retained moisture can cause corrosion or bioburden growth. In a vacuum chamber, the boiling point of water drops, so residual moisture vaporizes quickly at low temperatures, leaving the part dry and residue-free. Our vacuum drying modules typically operate at 5–10 kPa absolute, with cycle times under 10 minutes.
For solvent-cleaned parts, vapor degreasing combined with vacuum drying is the standard. After solvent immersion, parts are lowered into a vapor zone where hot solvent vapors condense and flush away remaining oils, followed by vacuum drying to recover the solvent. This technique achieves dry parts without water spots and can be integrated into multi-tank hydrocarbon or modified alcohol lines.
Designing Your Wash Line for Reliable High-Cleanliness Output
High cleanliness requirements are not met by accident. They demand a wash line engineered from the ground up around the specific part family and cleanliness standard. In our experience, the three most common reasons a multi-tank system fails to achieve the target specification are: insufficient rinse stages that cause drag-out of dirty solution, inconsistent chemical control that degrades wash effectiveness over a shift, and a drying stage that overlooks internal cavities.
For a given application, we start by analyzing the maximum particle count allowed, the part's geometry, and the production rate. We then determine the number and type of tanks needed, specify the ultrasonic frequencies, determine filtration grades, and select drying technology. The goal is a system that produces parts that consistently pass cleanliness validation, not one that works only under ideal lab conditions.
If you are specifying or upgrading a multi-tank ultrasonic washer for high-cleanliness work, send your part data and target standard to our team at [email protected] or call +86 17768507147. We'll develop a tank sequence, rinse strategy, and drying method that matches your requirements before you commit to capital expenditure.
Questions to Ask When Specifying a Multi-Tank Ultrasonic Washer
How do I know if I need a three-tank, four-tank, or five-tank system?
The number of tanks depends on your soil load, part complexity, and cleanliness target. A simple rule: if your current single- or two-tank machine fails to remove all visible oil or leaves water spots, a three-tank line (wash + rinse + dry) is a starting point. For quantified cleanliness limits (e.g., particle count per ISO 16232), you typically need at least four stages to include a separate ultrasonic rinse and DI water final rinse. Five stages or more allow for a pre-wash, multiple rinse stages, and advanced drying, which we recommend when parts contain blind holes or the specification requires ionic contamination control.
Can I use the same detergent in all tanks?
No. The wash tank contains a detergent at a specific concentration and temperature to remove the bulk contaminant. Rinse tanks use clean water (or a trace inhibitor) to remove residual detergent and loosened particulate. Using detergent in rinse tanks will leave a film and increase particle counts. We automate detergent dosing only in the wash tank, with conductivity or pH monitoring, while rinse tanks are fed continuously with fresh DI water to maintain purity.
What is the most common cause of failing a cleanliness test after a multi-tank wash?
In our experience, the leading cause is airborne or air-knife recontamination. Parts pass through the dryer but redeposit particles from the air or from the air knife's own filtration system. The second most common cause is an exhausted rinse tank that can no longer remove soluble salts. Both are fixed by upgrading drying filtration and implementing rinse tank water quality monitoring with automatic top-up. If your parts are failing a cleanliness test, share your post-wash particle data with us at [email protected]; we can often pinpoint the root cause from the particle distribution.
If you're interested, check out these related articles:
Boost Automotive Manufacturing Cleaning Efficiency: A Strategic Guide
Ultrasonic Cleaning Process: A Step by Step Technical Guide
Industrial Cleaning System ROI: Calculating Your Investment Return
How to Choose the Best Ultrasonic Power for an Ultrasonic Cleaning Machine ?
 English
  German
  Spanish
  French
  Russian
  Portuguese